This tutorial is created to illustrate the basic CRUD (Create , Read, Update, Delete) operation using SQL with Laravel 5.8. Laravel is one of the fastest growing frameworks for PHP built by Taylor Otwell.
Laravel 5.8 continues the improvements made in the previous release (version 5.7). Refer release notes to see the changes made in Laravel 5.8.
In this tutorial, You’ll learn the Basic CRUD operation in Laravel. Follow the step by step guide to create the CRUD application.
- Install Laravel
First, let install Laravel using the following command (Make sure you have installed composer in your PC). Click on Install Composer If you haven’t installed Composer on your PC.
composer create-project --prefer-dist laravel/laravel students
Code language: PHP (php)
- Configure Database Details
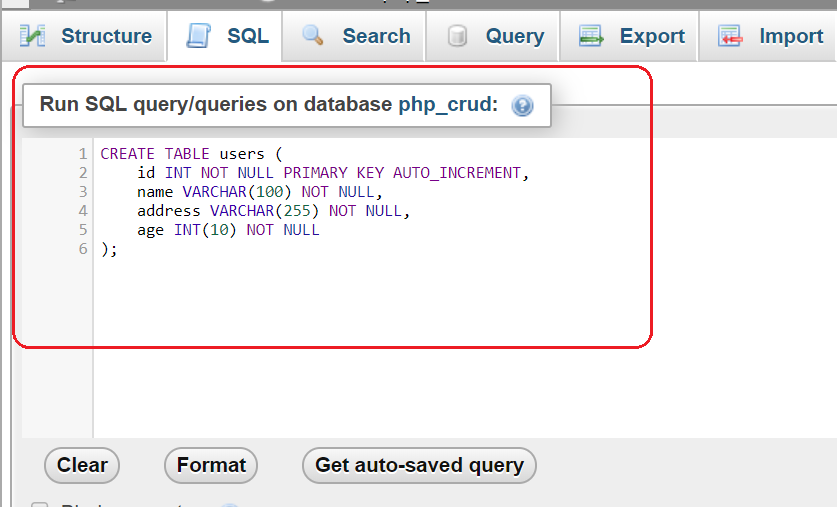
You need to create the database at MYSQL and then we need to connect that database to the Laravel project (You can also use phpmyadmin to create the database). Open the .env file inside Laravel project and add the database credentials as below.
.env
DB_CONNECTION=mysql
DB_HOST=127.0.0.1
DB_PORT=3306
DB_DATABASE='Your DB Name'
DB_USERNAME='Your DB UserName'
DB_PASSWORD='Your DB Password'
Code language: PHP (php)
- Create the migration file.
Go to the terminal and type the following php artisan command to generate the model and migration file.
php artisan make:migration create_students_table --create=students
Code language: PHP (php)
The migration will be created under “database/migrations“. Edit the file with the code below to create Students Table.
create_students_table.php
<?php
use Illuminate\Support\Facades\Schema;
use Illuminate\Database\Schema\Blueprint;
use Illuminate\Database\Migrations\Migration;
class CreateStudentsTable extends Migration
{
public function up()
{
Schema::create('students', function (Blueprint $table) {
$table->increments('id');
$table->string('name');
$table->text('detail');
$table->timestamps();
});
}
public function down()
{
Schema::dropIfExists('students');
}
}
Code language: Ceylon (ceylon)
Type the following command to run the migration.
php artisan migrate
- Create route, controller and model
In this step, Go to ‘routes->web.php’ file, add the following line of code.
Route::get('/', function () {
return redirect('/students');
});
Route::resource('students','StudentController');
Code language: PHP (php)
Create the Student model using the following command.
php artisan make:model Student
Code language: PHP (php)
The model wil be generated in “app/Student.php” Now, we will write the schema inside Student.php file.
Student.php
<?php
namespace App;

use Illuminate\Database\Eloquent\Model;

class Student extends Model
{
    protected $fillable = [
        'name', 'detail'
    ];
}
Code language: PHP (php)
Create the StudentController as resource using the following command.
php artisan make:controller StudentController --resource --model=Student
Code language: PHP (php)
app/Http/Controllers/StudentController.php
<?php
namespace App\Http\Controllers;

use App\Student;
use Illuminate\Http\Request;

class StudentController extends Controller
{

    public function index()
    {
        $students = Student::latest()->paginate(5);
        return view('students.index',compact('students'))->with('i', (request()->input('page', 1) - 1) * 5);
    }

    public function create()
    {
        return view('students.create');
    }

    public function store(Request $request)
    {
        $request->validate([
            'name' => 'required',
            'detail' => 'required',
        ]);

        Student::create($request->all());
        return redirect()->route('students.index')->with('success','Student created successfully.');
    }

    public function show(Student $student)
    {
        return view('students.show',compact('student'));
    }


    public function edit(Student $student)
    {
        return view('students.edit',compact('student'));
    }

    public function update(Request $request, Student $student)
    {
        $request->validate([
            'name' => 'required',
            'detail' => 'required',
        ]);

        $student->update($request->all());
        return redirect()->route('students.index')->with('success','Student updated successfully.');
    }


    public function destroy(Student $student)
    {
        $student->delete();
        return redirect()->route('students.index')->with('success','Student deleted successfully.');
    }
}
Code language: PHP (php)
- Create the view Files
You need to create a folder Inside resources -> views as students. Inside that folder, create the following five files.
- layout.blade.php
- index.blade.php
- create.blade.php
- edit.blade.php
- show.blade.php
resources/views/students/layout.blade.php
<!DOCTYPE html>
<html>
<head>
    <title>Laravel 6.0,5.8 CRUD Application - bishrulhaq.com</title>
    <link rel="stylesheet" href="https://maxcdn.bootstrapcdn.com/bootstrap/4.0.0/css/bootstrap.min.css" integrity="sha384-Gn5384xqQ1aoWXA+058RXPxPg6fy4IWvTNh0E263XmFcJlSAwiGgFAW/dAiS6JXm" crossorigin="anonymous">
</head>
<body>

<div class="container">
    <div class="card" style="margin-top: 20px;">
        <div class="card-body">
        @yield('content')
        </div>
    </div>
</div>

</body>
</html>
Code language: HTML, XML (xml)
resources/views/students/index.blade.php
@extends('students.layout')

@section('content')

    <div class="row">
        <div class="col-lg-12">
            <h2 class="text-center">Simple Student Management CRUD Application</h2>
        </div>
        <div class="col-lg-12 text-center" style="margin-top:10px;margin-bottom: 10px;">
            <a class="btn btn-success " href="{{ route('students.create') }}"> Add Student</a>
        </div>
    </div>

    @if ($message = Session::get('success'))
        <div class="alert alert-success">
            {{ $message }}
        </div>
    @endif

    @if(sizeof($students) > 0)
        <table class="table table-bordered">
            <tr>
                <th>No</th>
                <th>Name</th>
                <th>Details</th>
                <th width="280px">More</th>
            </tr>
            @foreach ($students as $student)
                <tr>
                    <td>{{ ++$i }}</td>
                    <td>{{ $student->name }}</td>
                    <td>{{ $student->detail }}</td>
                    <td>
                        <form action="{{ route('students.destroy',$student->id) }}" method="POST">

                            <a class="btn btn-info" href="{{ route('students.show',$student->id) }}">Show</a>
                            <a class="btn btn-primary" href="{{ route('students.edit',$student->id) }}">Edit</a>

                            @csrf
                            @method('DELETE')

                            <button type="submit" class="btn btn-danger">Delete</button>
                        </form>
                    </td>
                </tr>
            @endforeach
        </table>
    @else
        <div class="alert alert-alert">Start Adding to the Database.</div>
    @endif

    {!! $students->links() !!}

@endsection
Code language: HTML, XML (xml)
resources/views/students/create.blade.php
@extends('students.layout')

@section('content')

    <div class="row">
        <div class="col-lg-12">
            <h2 class="text-center">Add Student</h2>
        </div>
        <div class="col-lg-12 text-center" style="margin-top:10px;margin-bottom: 10px;">
            <a class="btn btn-primary" href="{{ route('students.index') }}"> Back</a>
        </div>
    </div>

    @if ($errors->any())
        <div class="alert alert-danger">
            <strong>Oops!</strong> There were some problems with your input.<br><br>
            <ul>
                @foreach ($errors->all() as $error)
                    <li>{{ $error }}</li>
                @endforeach
            </ul>
        </div>
    @endif

    <form action="{{ route('students.store') }}" method="POST">
        @csrf

        <div class="row">
            <div class="col-xs-12 col-sm-12 col-md-12">
                <div class="form-group">
                    <strong>Name:</strong>
                    <input type="text" name="name" class="form-control" placeholder="Name">
                </div>
            </div>
            <div class="col-xs-12 col-sm-12 col-md-12">
                <div class="form-group">
                    <strong>Detail:</strong>
                    <textarea class="form-control" style="height:150px" name="detail" placeholder="Detail"></textarea>
                </div>
            </div>
            <div class="col-xs-12 col-sm-12 col-md-12 text-center">
                <button type="submit" class="btn btn-primary">Submit</button>
            </div>
        </div>

    </form>
@endsection
Code language: HTML, XML (xml)
resources/views/students/edit.blade.php
@extends('students.layout')

@section('content')

    <div class="row">
        <div class="col-lg-12">
            <h2 class="text-center">Edit Student</h2>
        </div>
        <div class="col-lg-12 text-center" style="margin-top:10px;margin-bottom: 10px;">
            <a class="btn btn-primary" href="{{ route('students.index') }}"> Back</a>
        </div>
    </div>

    @if ($errors->any())
        <div class="alert alert-danger">
            <strong>Whoops!</strong> There were some problems with your input.<br><br>
            <ul>
                @foreach ($errors->all() as $error)
                    <li>{{ $error }}</li>
                @endforeach
            </ul>
        </div>
    @endif

    <form action="{{ route('students.update',$student->id) }}" method="POST">
        @csrf
        @method('PUT')

        <div class="row">
            <div class="col-xs-12 col-sm-12 col-md-12">
                <div class="form-group">
                    <strong>Name:</strong>
                    <input type="text" name="name" value="{{ $student->name }}" class="form-control" placeholder="Name">
                </div>
            </div>
            <div class="col-xs-12 col-sm-12 col-md-12">
                <div class="form-group">
                    <strong>Detail:</strong>
                    <textarea class="form-control" style="height:150px" name="detail" placeholder="Detail">{{ $student->detail }}</textarea>
                </div>
            </div>
            <div class="col-xs-12 col-sm-12 col-md-12 text-center">
                <button type="submit" class="btn btn-primary">Submit</button>
            </div>
        </div>

    </form>
@endsection
Code language: HTML, XML (xml)
resources/views/students/show.blade.php
@extends('students.layout')

@section('content')

    <div class="row">
        <div class="col-lg-12">
            <h2 class="text-center">Show Student</h2>
        </div>
        <div class="col-lg-12 text-center" style="margin-top:10px;margin-bottom: 10px;">
            <a class="btn btn-primary" href="{{ route('students.index') }}"> Back</a>
        </div>
    </div>

    <div class="row">
        <div class="col-xs-12 col-sm-12 col-md-12">
            <div class="form-group">
                <strong>Name:</strong>
                {{ $student->name }}
            </div>
        </div>
        <div class="col-xs-12 col-sm-12 col-md-12">
            <div class="form-group">
                <strong>Details:</strong>
                {{ $student->detail }}
            </div>
        </div>
    </div>
@endsection
Code language: HTML, XML (xml)
Finally, Laravel CRUD Application is ready to run. Type the following command in your terminal to run the application.
php artisan serve
Code language: PHP (php)
Hope this tutorial helps you! Feel free to drop your opinion at the comment section.