
The tutorial is created to implement facebook login using Socialite in Laravel 6.0, 5.8 , 5.7 and 5.6. Using Facebook Auth to log and register into your Laravel Application. Follow the steps below to implement laravel socialite facebook login.
- Install Laravel 5.8
First, let install Laravel 5.8 using the following command (Make sure you have installed composer in your PC). Click on Install Composer If you haven’t installed Composer on your PC.
composer create-project --prefer-dist laravel/laravel facebookAuth
- Configure Database Details
You need to create the database at MYSQL and then we need to connect that database to the Laravel project (You can also use phpmyadmin to create the database). Open the .env file inside Laravel project and add the database credentials as below.
.env
DB_CONNECTION=mysql
DB_HOST='Your DB Host'
DB_PORT='Your DB Port'
DB_DATABASE='Your DB Name'
DB_USERNAME='Your DB UserName'
DB_PASSWORD='Your DB Password'- Add Socialite
Go to the terminal and type the following php artisan command to download Socialite Package.
composer require laravel/socialiteAfter installing the package , Configure the provider and aliases in “config/app.php”. Edit the file with the code below.
config/app.php
'providers' => [
 // Other service providers…
 Laravel\Socialite\SocialiteServiceProvider::class,
 ],

'aliases' => [
 // Other aliases…
 'Socialite' => Laravel\Socialite\Facades\Socialite::class,
], - Get Secret id and key from Facebook Developer Console
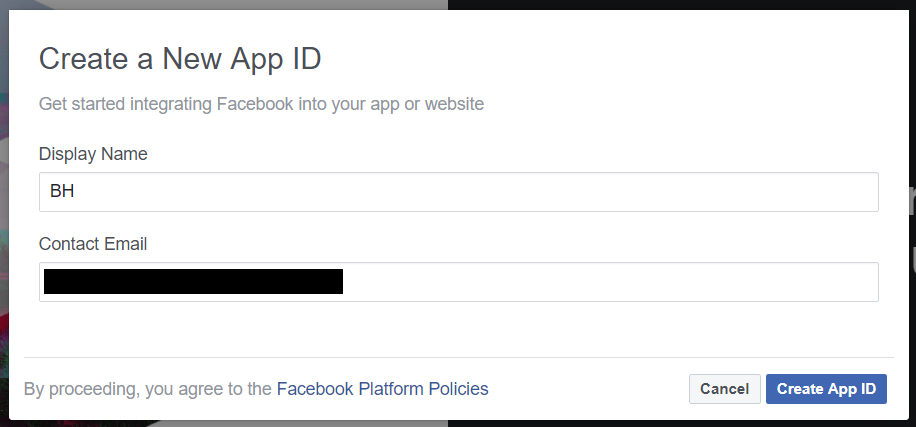
In this step, Configure the CLIENT ID and CLIENT SECRET to add facebook a authentication to your laravel project, Lets begin by opening Developer Console and then create a new App by submitting the name and email.
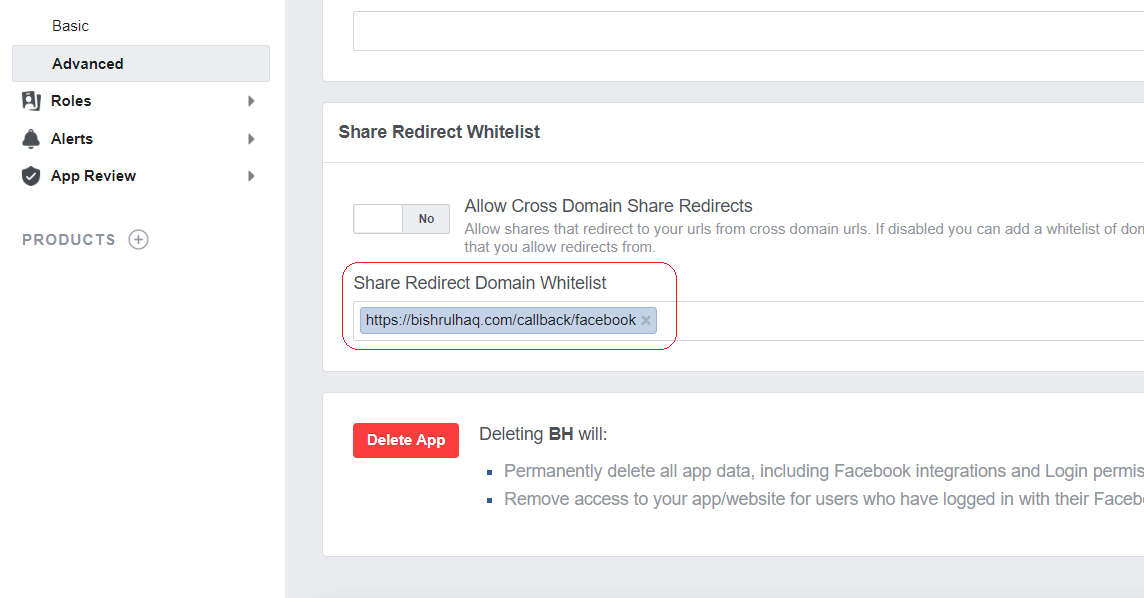
After creating the App, go to Setting->Advanced and set redirect url as shown below.
Now it’s time to add Facebook Login by navigating to products in the left menu.
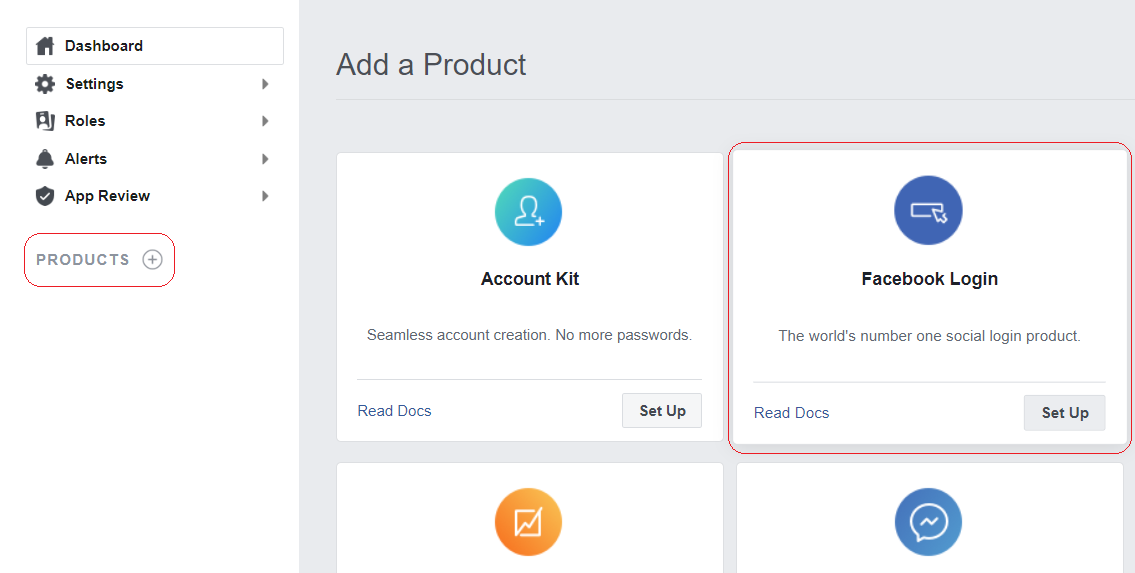
Developer Console Product
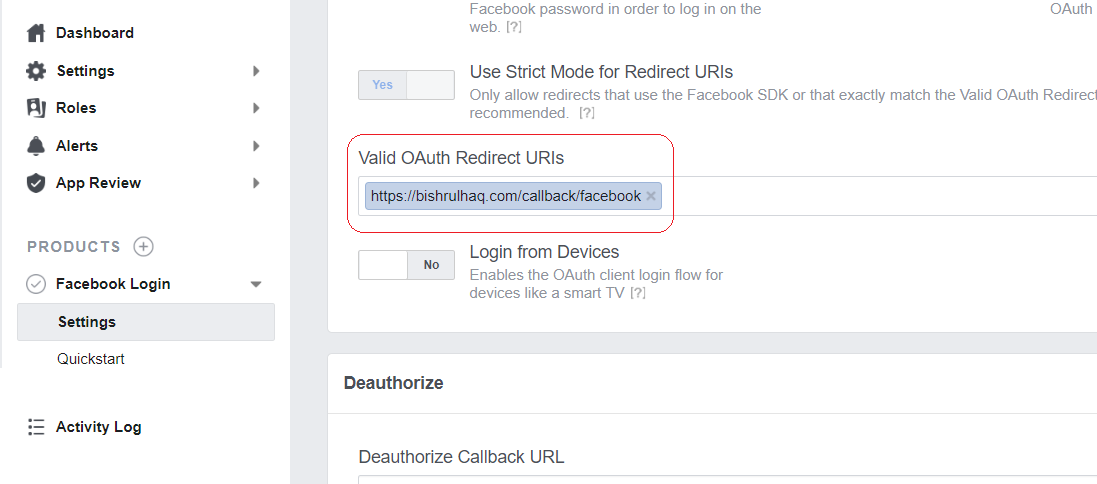
In this Step, Specify Auth redirect url facebook login->setting and set valid auth redirect url.
After successfully configuring the app on facebook developer console, Set the client id and client secret in config/service.php as shown below
config/service.php
'facebook' => [
     'client_id' => 'xxxx',
     'client_secret' => 'xxx',
     'redirect' => 'https://bishrulhaq.com/callback/facebook',
], - Create route, controller and model
In this step, Go to app/User.php file and add the following line of code.
app/User.php
protected $fillable = ['name', 'email', 'password', 'provider', 'provider_id' ];In this step, Go to app/database/create_users_table.php and add the code below
app/database/create_users_table.php
<?php
use Illuminate\Support\Facades\Schema;
use Illuminate\Database\Schema\Blueprint;
use Illuminate\Database\Migrations\Migration;

class CreateUsersTable extends Migration
{
    /**
     * Run the migrations.
     *
     * @return void
     */
    public function up()
    {
        Schema::create('users', function (Blueprint $table) {
            $table->increments('id');
            $table->string('name');
            $table->string('email')->unique()->nullable();
            $table->string('provider');
            $table->string('provider_id');
            $table->timestamp('email_verified_at')->nullable();
            $table->string('password')->nullable();
            $table->rememberToken()->nullable();
            $table->timestamps();
        });
    }

    /**
     * Reverse the migrations.
     *
     * @return void
     */
    public function down()
    {
        Schema::dropIfExists('users');
    }
}
Now it’s time to run Laravel Default Auth by typing the command at your terminal.
php artisan make:authNext, You need to type the following command to run the migration.
php artisan migrate
If you encounter any errors while migrating the table. Add String length under boot method at app/providers/AppServiceProvider.php file and re-run the migration.
use Illuminate\Support\Facades\Schema;

 function boot()
 {
     Schema::defaultStringLength(191);
 }
In this step, Go to ‘routes->web.php’ file, add the following line of code.
routes->web.php
Route::get('/auth/redirect/{provider}', 'AuthController@redirect');
Route::get('/callback/{provider}', 'AuthController@callback');
Create AuthController by typing the following command.
php artisan make:controller AuthController<?php
namespace App\Http\Controllers;
use Illuminate\Http\Request;
use Validator, Redirect, Response, File;
use Socialite;
use App\User;
class AuthController extends Controller
{
public function redirect($provider)
{
return Socialite::driver($provider)->redirect();
}
public function callback($provider)
{
$getInfo = Socialite::driver($provider)->user();
$user = $this->createUser($getInfo, $provider);
auth()->login($user);
return redirect()->to('/home');
}
function createUser($getInfo, $provider)
{
$user = User::where('provider_id', $getInfo->id)->first();
if (!$user) {
$user = User::create([
'name' => $getInfo->name,
'email' => $getInfo->email,
'provider' => $provider,
'provider_id' => $getInfo->id
]);
}
return $user;
}
}
- Edit the View
Go to Resources/Views/Auth/login.blade.php and add facebook social login button under the login area.
Resources/Views/Auth/login.blade.php
<hr>
<div class="form-group row mb-0">
 <div class="col-md-8 offset-md-4">
    <a href="{{ url('/auth/redirect/facebook') }}" class="btn btn-primary"><i class="fa fa-facebook"></i> Facebook</a>
 </div>
</div>
Finally, Laravel Facebook Auth Application is ready to run. Type the following command in your terminal to run the application.
php artisan serve
Hope this tutorial helped you! Feel free to drop your opinion at the comment section.


Comments
0No comments yet. Be the first to share your thoughts.